My ms thesis is finally complete!

What a journey!
After 6 months of hard work, yesterday I’ve finally managed to send the complete version of my ms thesis to be reviewed from my thesis supervisor. It’s my first “serious” work entirely made with Rmarkdown. I wanted to share what resources I used to make this entire work possible and how I managed to get all the things working appropriately. Enjoy!
Just finished writing my thesis using #rmarkdown! I've learned soooooo much! #rmarkdown #rstats— Francesco Tranquillo (@FraTra94) August 18, 2019
Why Rmarkdown?
If you already know R and R Markdown, you can skip to the next section. When I started sorting things out for my thesis, I didn’t know anything about LaTeX. I knew in advance I would have used R as my first choice programming language for all the thesis work and I wanted to minimize the struggle I’ve always encountered while working with Microsoft Word (“WHY CAN’T THIS PICTURE STAY EXACTLY HERE?!” [cit. Me, 2015]). I won’t explain how all the magic works, there are already a ton of guides and documentation about it. I’m going to explain how and why Rmarkdown was the perfect solution which suited best for me:
- Rmarkdown is a tool from R Studio which is used to write high quality documents of any kind (reports, presentations and even dashboards).
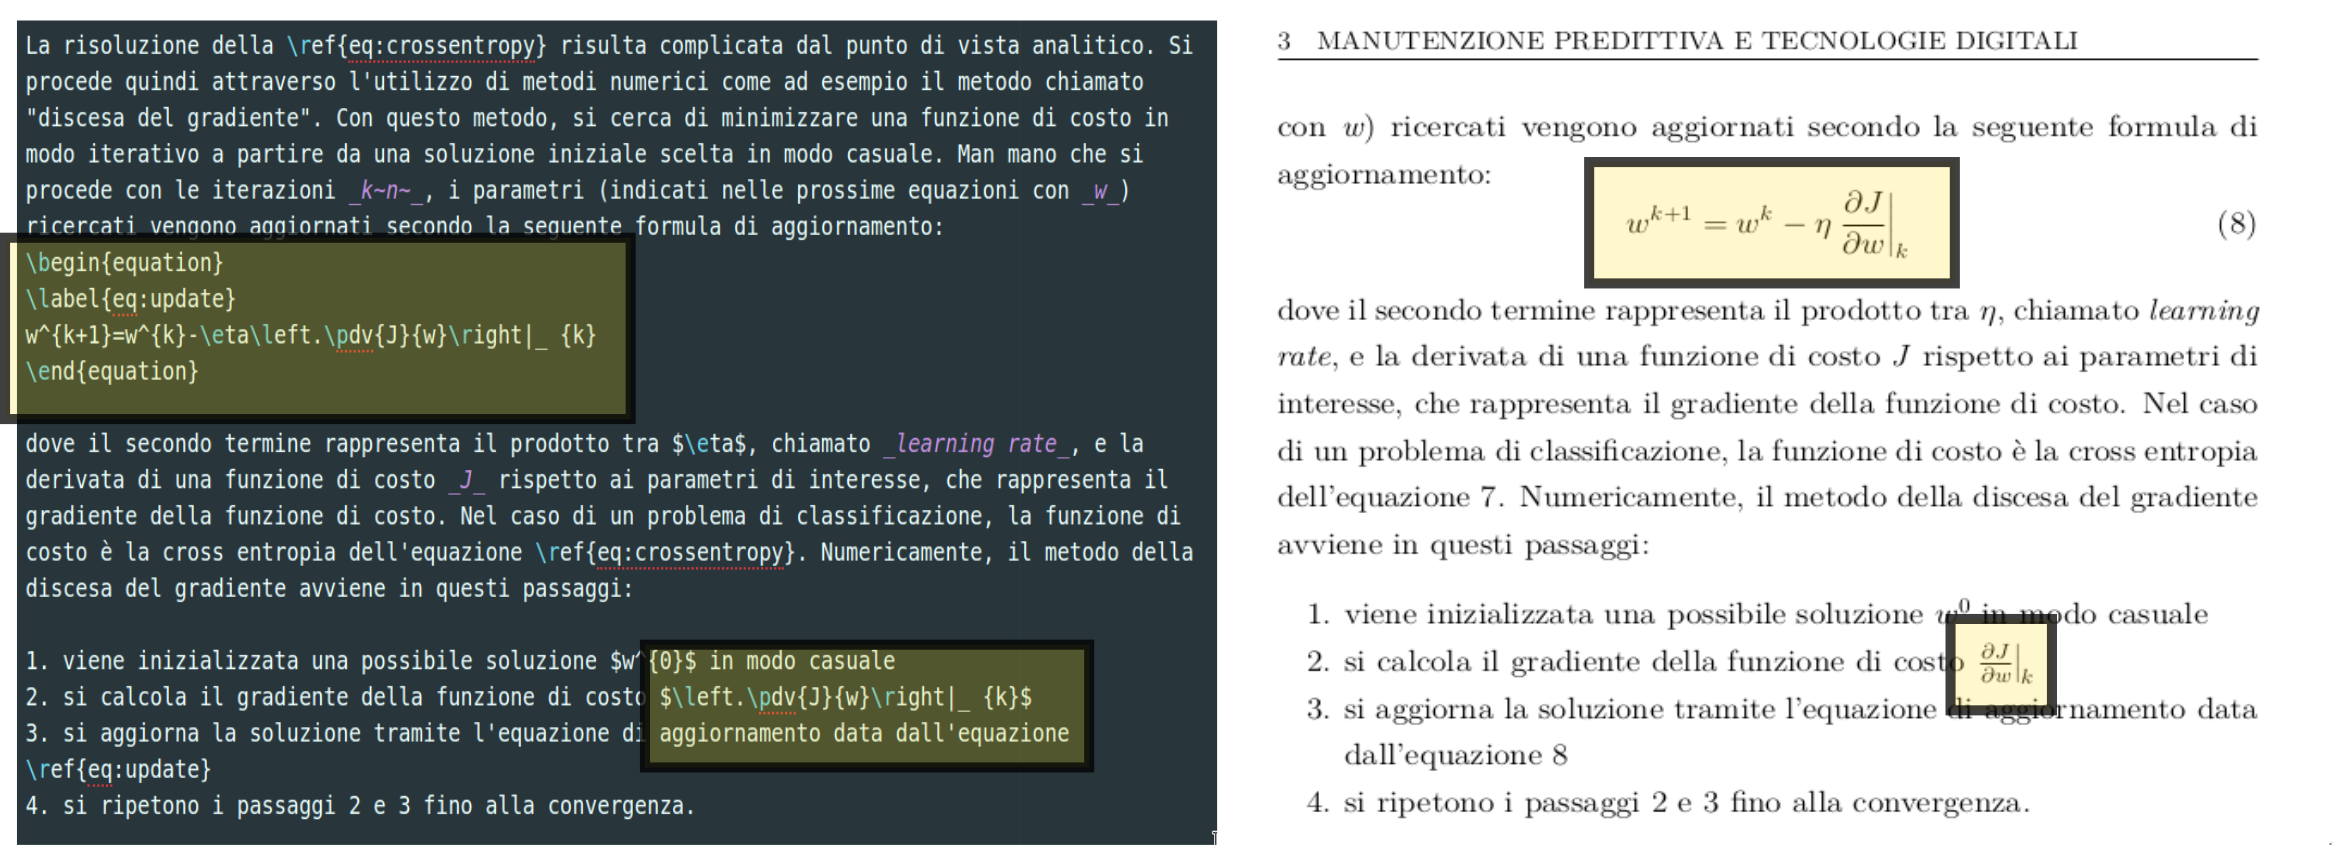
- While writing my ms thesis, I needed to write some equations (we engineers love equations). Using Rmarkdown, I could write the equations I needed, using some LaTeX basics and the results were simply amazing:
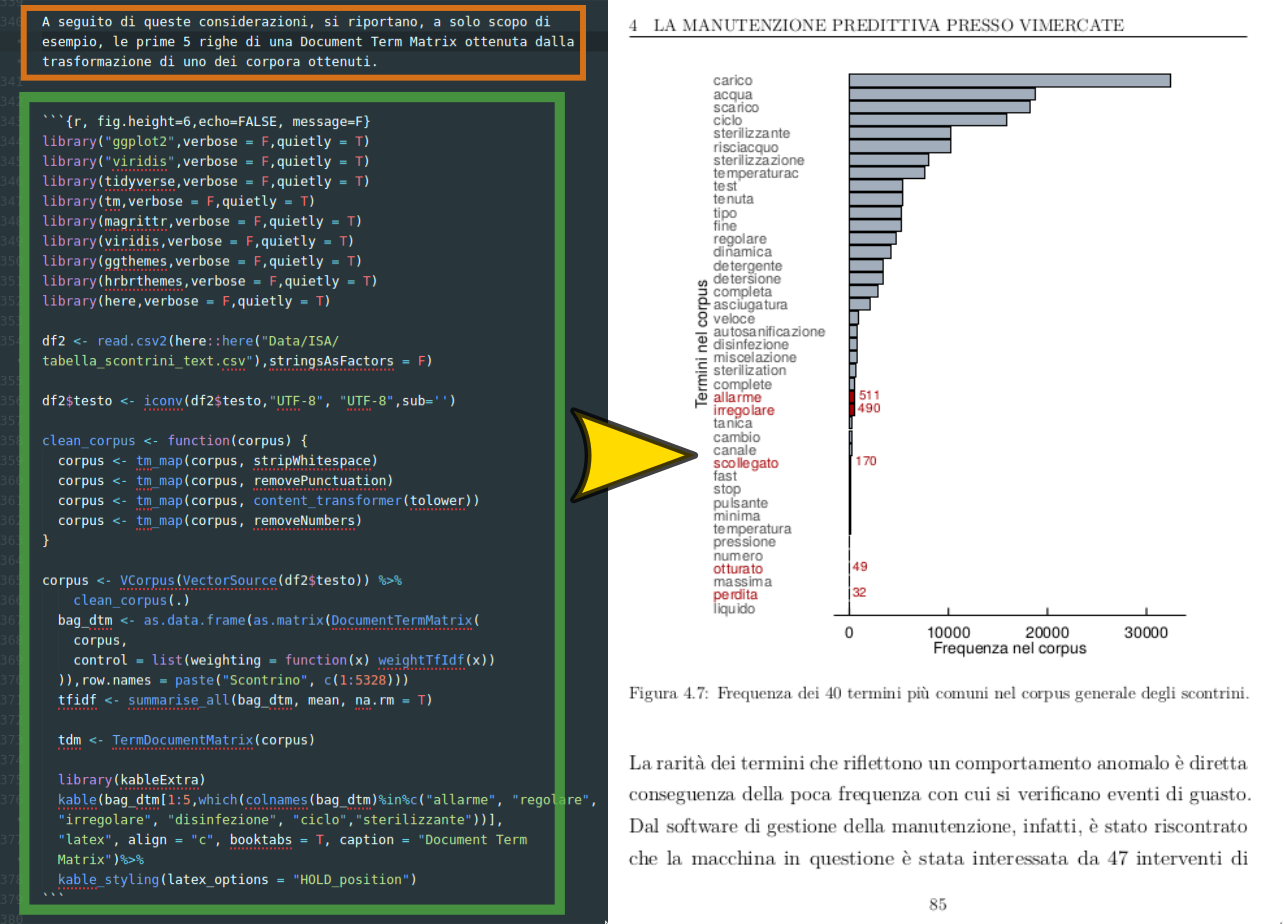
- An .rmd file is a plain text document in which one can insert code chunks of different programming language (Python, R) in order to make…anything you could do with some code. In my thesis, I’ve used some R code chunks in order to build plots and tables (as in the picture below). The orange box represents the plain text of the thesis. The code chunk, in the green box, is where I put all the R code needed to create the bar plot. No need to build the plot on a new R script and exporting the resulting image in a file: everything I need is already in the chapter file, ready to be modified if needed.
Requirements
This is the list of the tools I’ve used while writing my thesis:
Atom: a versatile, powerful and highly customizable (thanks to the many addons available) text editor which I used to organize and write all the chapters for my thesis. Atom also comes with Git and Github integrations which made it really easy to manage all the files of my thesis repository.
Rstudio and Rmarkdown, of course. I’ve used Rmarkdown to write the main.rmd file which is the master file where I’ve set all the instructions to build the different parts of the thesis.
Zotero: a free and simple tool which I used to organize all the documents and papers that I wanted to cite. Using Atom, I’ve also installed the package called Zotero-picker which is really great to invoke Zotero and add citations keys.
Settings
This is what my project folder looks:
As you can see, every chapter has its own folder containing a markdown file (the one with the “.md” extension) and a folder containing images related to that chapter. The most important file is the one called main.Rmd which is the one that get processed first from Rmarkdown. The file is divided in 2 parts:
- YAML header: which is basically a set of instructions that Rmarkdown need to “knit” and produce the final
.pdffile. The YAML section looks like this:
---
bibliography: My Library.bib
csl: style.csl
fontsize: 12pt
geometry: asymmetric
header-includes:
- \usepackage{emptypage}
- \usepackage[italian]{babel}
- \usepackage{placeins}
- \usepackage{setspace}
- \usepackage{float}
- \usepackage{chngcntr}
- \usepackage{amsmath}
- \usepackage{physics}
- \usepackage{enumitem}
- \usepackage{textcomp}
- \usepackage{tikz}
- \usetikzlibrary{positioning}
- \onehalfspacing
- \counterwithin{figure}{section}
- \counterwithin{table}{section}
- \evensidemargin=0in
- \oddsidemargin=0.5in
- \usepackage{fancyhdr}
- \usepackage{listings}
- \lstset{basicstyle=\ttfamily\footnotesize,breaklines=true, aboveskip=\medskipamount}
- \floatplacement{figure}{H}
linestretch: 1.5
link-citations: yes
output:
  word_document: default
  pdf_document:
    fig_caption: yes
    fig_height: 3
    fig_width: 5
    number_sections: yes
---
All the LaTeX commands - \usepackage{...} have been added whenever I needed to have more customization using LaTeX.
bibliography: My Library.bib is the instruction that says to Rmarkdown (more precisely to Pandoc) what file to use in order to compile the bibliography at the end of the document.
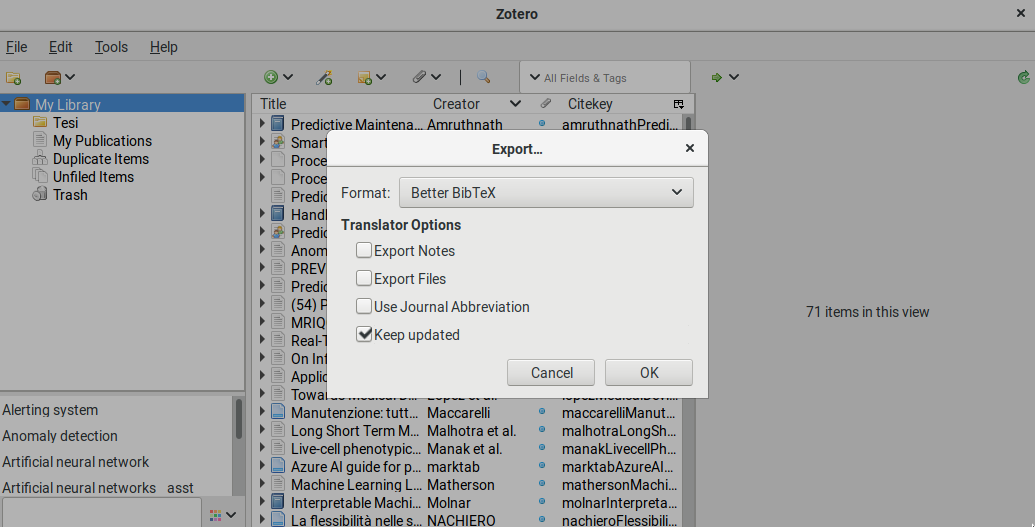
My Library.bib can be automatically generated by Zotero using his addon “Better BibTex for Zotero”, which can be installed via the Add-ons Manager of Zotero. Thanks to this addon, Zotero can automatically export and update all the citekeys in your bibliography to a single, always-up-to-date, .bib file, which will be used to “build” the bibliography.
The second part of the main.rmd file looks like this:
```{r child='frontespizio.rmd'}
```
\NewPage
```{r child='dedica.rmd'}
```
\pagebreak
\pagenumbering{Roman}
\tableofcontents
\newpage
\listoffigures
\newpage
\listoftables
\cleardoublepage
```{r child='sommario_abstract.rmd'}
```
\newpage
\pagenumbering{arabic}
\pagestyle{fancy}
\fancyhead[LO]{\leftmark}
\fancyhead[RO]{}
\fancyhead[RE]{\rightmark}
\fancyhead[LE]{}
```{r child='introduzione/introduzione.md'}
```
\pagebreak
```{r child='man_dm/man_dm.md'}
```
\pagebreak
```{r child='digital/digital.md'}
```
\pagebreak
```{r child='vim_pred/vim_pred.md'}
```
\pagebreak
```{r child='insight/insight.md'}
```
\pagebreak
```{r child='conclusioni/conclusioni.md'}
```
\pagebreak
\pagestyle{plain}
```{r child='bibliografia.md'}
```
As you can see the chapters are included using “child” chunks and separated by a simple LaTeX pagebreak command. In particular, every chapter is a markdown file in which one could also insert LaTeX if needed, since everything is then knitted together by Rmarkdown into a .pdf file thanks to Pandoc conversion.


